
Shopify is a powerful e-commerce platform with an intuitive user interface that makes creating and managing an online store easy. Adding products to your Shopify store is the first step towards building a successful e-commerce business.
With Shopify’s vast features, merchants can easily add and customize their product listings, create beautiful product pages, and even offer discounts and promotions.
In this guide, we’ll walk you through each step of how to add products to Shopify store, from uploading product images to setting prices and product descriptions.
You’ll also learn important tips on optimizing your product listings for SEO and increasing customer engagement. By the end of this guide, you’ll have all the knowledge you need to start creating beautiful, profitable product listings in no time.
Table of Contents
How to Add Products to Shopify
Shopify is a popular e-commerce platform allowing entrepreneurs to create and manage online stores easily. Adding products to your Shopify store is critical to setting up your e-commerce business. Here, we will discuss how to add products to Shopify in 10 easy steps using the information provided by the search results.
Step 1: Log in to your Shopify Admin Dashboard
The first step is to log in to your Shopify Admin Dashboard. You can do this by entering your login details at the Shopify homepage. Once you log in, you will land on the dashboard for admins.
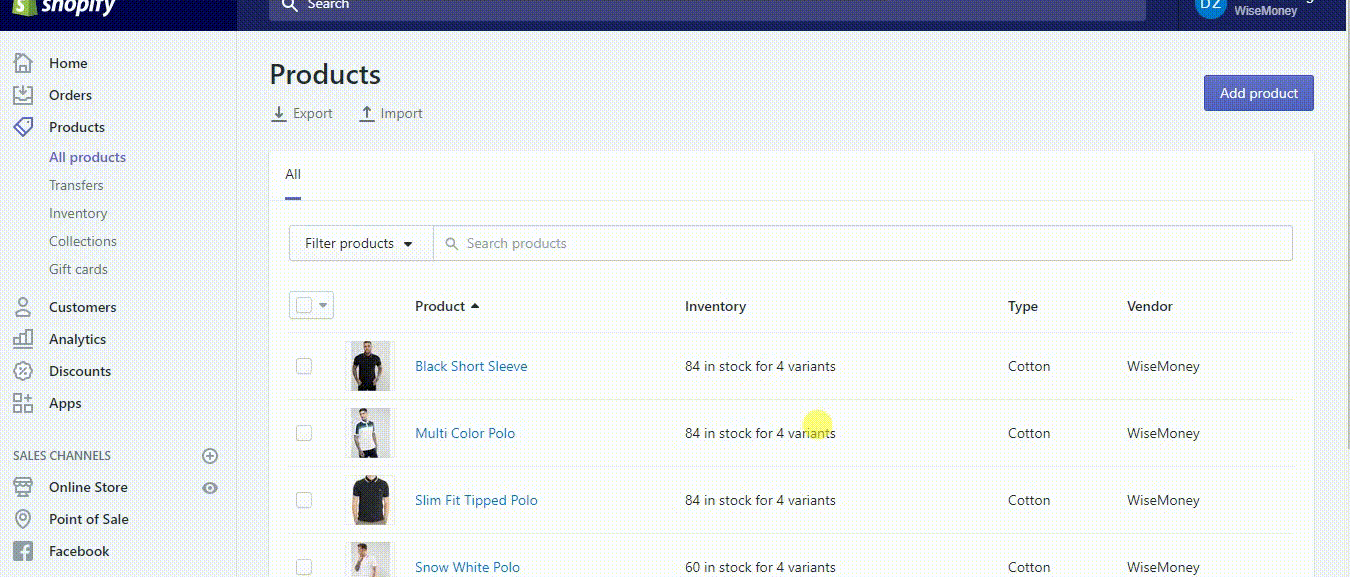
Step 2: Choose Products in Shopify Admin
From the left of the dashboard, click on Products. A Products page will open, and you will see existing products, if any, or a button saying Add product. Click on the Add product button to start adding products to Shopify.
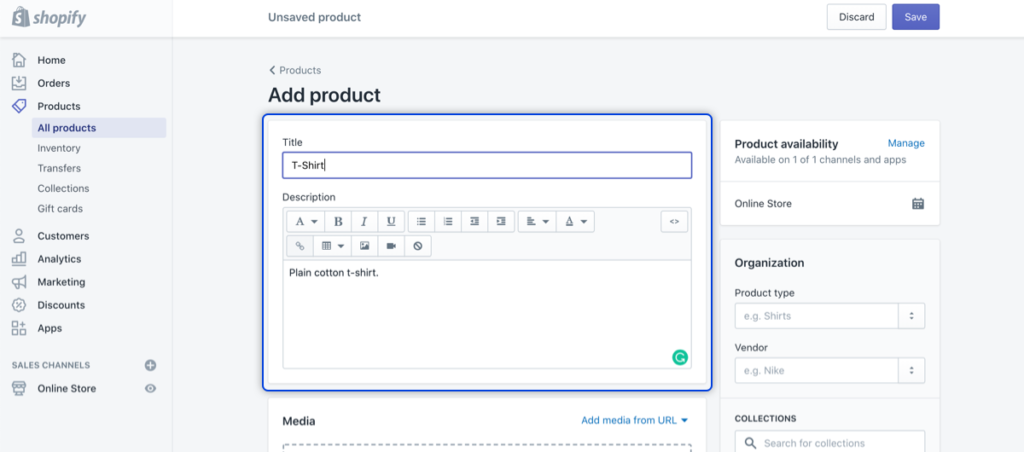
Step 3: Enter the Product Title and Description
In this step, you need to add the title and description of the product. The product title should be short, memorable, and easily searchable. The description should be clear and concise, providing relevant product information. You can also add tags to help organize and categorize your products.
Step 4: Add Product Images and Videos
Adding product images and videos is essential to creating a successful e-commerce store. High-quality product images and videos can attract customers and increase sales. To add images, click the Add images button, select the images you want to upload, and click Save. You can also add videos by clicking the Add video button and entering the URL.
Step 5: List Your Product Price
In this step, you need to list the price of your product. Enter the price of the product in the Price field. You can also offer discounts by setting up sale prices or creating discount codes.
Step 6: Add Inventory Details
Adding inventory details is important to keep track of your stock levels and avoid overselling. Enter the SKU, barcode, and the quantity of the product you have in stock. You can also set a low stock alert to get notified when your inventory is running low.
Step 7: Add Shipping Details
In this step, you need to add the shipping details of the product. You can set up shipping rates for different regions or countries, offer free shipping, or use third-party shipping apps to handle shipping and tracking.
Step 8: Add Product Variants
If your product has different colors, sizes, or other variations, you can add them as product variants. Click on the Add variant button and enter the variant details, such as color, size, and price. You can also set up an SKU for each variant.
Step 9: Edit Search Engine Listing
You need to optimize the search engine listing to make your product easily searchable and visible to potential customers. Enter the product’s meta description, title tag, and other SEO-related details. You can also add a URL and handle the redirects for the product.
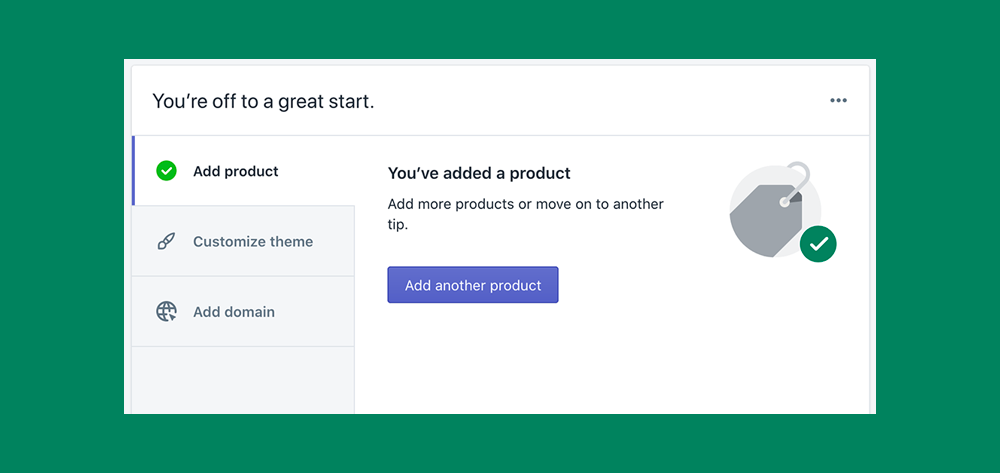
Step 10: Save and Publish Your Product
Once you have added all the necessary details, click on the Save button to save your product. You can preview your product before publishing it to your Shopify store. Once satisfied, click the Publish button to make the product live on your store. This is how to add products to Shopify.
Import Shopify products
To import products into your Shopify store, you can use a specially-formatted CSV (comma-separated value) file to transfer a large amount of product information between Shopify and another system. To do this, go to your Shopify admin, click on Products, then click All products, and then click Import.
Click Add file and select the CSV file you want to import. Ensure that the file is correctly formatted, then click Upload and continue. You will receive a confirmation email when the procedure is complete.
Alternatively, there are apps available in the Shopify app store, such as the Multichannel Importer app, that can import product details through any CSV to your Shopify store with all the details of the product like its variants, description, images, price, inventory, etc.
Add New Products with Shopify POS
First, to add new products with Shopify POS, ensure you’re signed into your Shopify POS account and connected to the internet. Tap the “+” button from the checkout screen to add a new product. Enter the product information, such as title, price, and inventory status.
You can also add an image for the new product. Alternatively, you can add new products from your Shopify admin by going to the Products page, clicking “Add product,” entering the title and details, and clicking “Save”.
List Products to Sales Channels
To list products to sales channels in Shopify, you can follow these steps:
- To access the apps and sales channels page from your Shopify admin, click “Settings” first.
- Click on “Manage” to include or exclude products from a sales channel or market. All sales channels and markets are selected by default.
- Go to “Products” and select “All products” from the Shopify app.
- Tap on a product and then select “Sales channels”. Enable each channel where you want the product to be available, and disable the rest.
- To promote and sell on sales channels, customize where your products appear by selecting the right shoppers.
Note that API options lets you publish products to all channels when creating a new product. Also, consider using AI-powered tools like Productly to create product listings and boost your SEO quickly.
Archive Products on Shopify
By logging into your Shopify admin and going to the Products section, you can archive products on Shopify. Select the product or products you want to archive and click the Archive button. Another way to archive a product is by scrolling to the bottom of the product in your Shopify admin (as if you were editing the product) and clicking the Archive Product button. Archived products can still be accessed through their URLs.
Delete Products on Shopify
To delete products on Shopify, go to your Shopify admin and navigate to the Products section. Select the product you want to delete and click “Delete product”. You can also delete multiple products at once by selecting them and using the “bulk actions” option.
Deleting products that will not be used again can improve your SEO. Additionally, you can use apps like “Delete Products in Bulk” to quickly and automatically delete products.