People say you can judge a man by his shoes, which is very much right. But when there are thousands of people wearing the same shoes as yours, how do you have the chance of standing out? No matter how expensive your new pair of shoes are, you can always find a few people wearing the same ones. Thus, you do not become exclusive even by spending so much money. The only solution to your problem is Custom Shoes. You can find brands that customize shoes to make them look unique. However, that will only add cost to your already expensive shoes. Do not worry, here we have brought four ways in which you can make custom shoes at your home. So you can look exclusive without spending money on getting the shoes customized by someone else.
Paints
Adding designs or colours to your everyday pair of shoes is a great way to customize them. Here is the list of products that you will need for this method of making custom shoes.
- Acetate
- Q-Tips
- Soft Painters Tape
- Brushes – Fine and Medium Line
- Airbrush
- Professional Leather Paint
- Cotton Swabs
- Acrylic Finisher
If you cannot find these items at home, you can easily order them online. Once you have grabbed all of them, you can move on to the procedure of making custom shoes. Here are the steps that you need to follow.
Step 1: Removing The Clear Coat
Almost all good brands apply a clear coat on the shoes to maintain their quality for a longer time. If you use paint directly on to this coat, it will start cracking after some time. So you need to ensure that the clear coat is removed before you begin showing off your painting skills.
To remove it, you need to dip cotton swabs into acetone and wipe the shoes. To reach hard areas, you can use Q-tips. Repeat it for two to three times, to get rid of the entire clear coat layer. Let the shoes dry before you move on to the next step.
#Tip: Remove the shoelaces so that you do not miss out on any area.
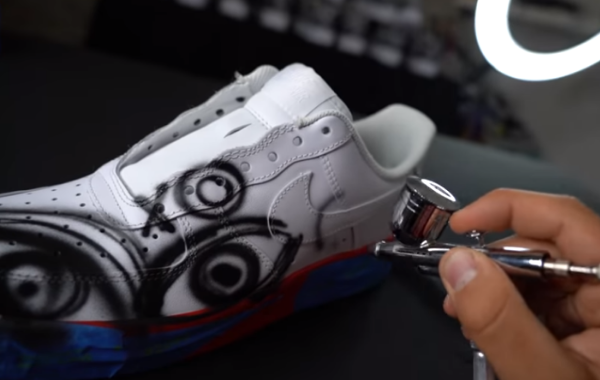
Step 2: Getting Ready To Paint
It is crucial to secure your hands with gloves so that you do not end up getting all dirty. But it is equally important to hide those parts of the shoes that you do not want to paint. If you are using the airbrush, then this step is a must.
You need to mask the shoe areas that you do not want to ruin with paint, which can easily be done with the help of soft painters tape. Remember to apply the tape properly so that no paint enters the areas.
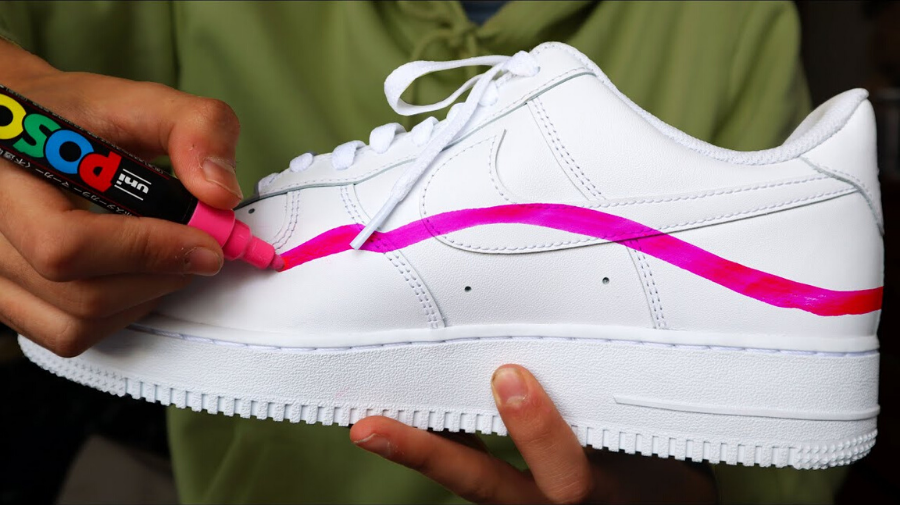
Step 3: Create Designs
You can start by filling the remaining areas with a single solid colour. Once done with that, you can create designs with fine and medium line brushes. (umm.net) If you are not a great designer, then you can use only solid colours. Lock the paint with a coat of acrylic finisher.
You can also paint laces to complete the look of the shoes.
Sharpies

If you are more on the artistic side and you want your shoes to express that, then this method of creating custom shoes would be the best fit for you. It is way simpler than the previous paint technique as you do not need to create a mess in this. The things you need for this are:
- Sharpies
- Painter Tape
- Acrylic Finisher
There are no multiple steps in this method of creating custom shoes. You can start off by masking the areas that you do not want to touch with the sharpies. You might be precise with the use of markers, but masking will help you in avoiding any accidents of unwanted stains.
Once done with masking, you can pick up your favourite colour sharpies and start creating designs. Remember, the colour of the sharpie should fit with the colour of the shoes. For example, if you pick a light colour pen for dark-coloured shoes, then you might not get the desired results. You can create any fictional characters, or you can keep it simple with artistic designs.
You can also use multiple sharpies to get a more colourful design. After creating the design, you have to lock it with an acrylic finisher. It will ensure that the design does not get ruined in water or the sun.
Embellishments
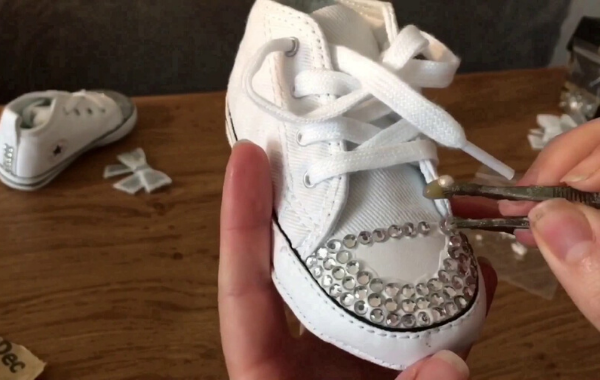
If you are not too good with paints or designs, then you do not need to worry because we have options for you as well. This method of creating custom shoes is easier and faster than the previous two methods. You can also do this at the last minute to give a new twist to your shoes. The products you will need for this are:
- Super Glue or Industrial Glue
- Rhinestones or Some Other Embellishments
You can use a simple brooch or pendant to make custom shoes, but that will not give an artistic touch to the design. If you really want to look distinctive, then you can pick small rhinestones and create a beautiful pattern with it anywhere on the shoes. You can stick them to the backside, or you can put them on the borders of the front. Whatever design you might create, you can never go wrong with rhinestones.
Fabric and Ribbons
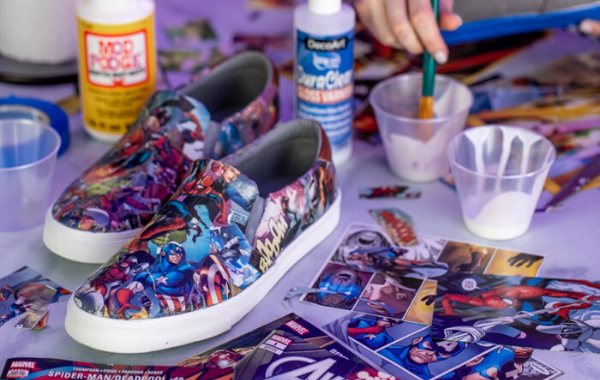
For this method of creating custom shoes, you do not need much of that artistic touch. You only need three items:
- Fabric
- Ribbons
- Mod Podge
You have to apply mod podge everywhere on the shoe and stick the fabric on it. Once it gets dry, you can cut out all the excess fabric. To seal it, you will have to apply another layer of mod podge onto the fabric. After your fabric custom shoes are ready, you can replace their laces with ribbons, and make them even more beautiful.
If your shoes do not have laces, you can create a bow or flower with the ribbon and stick it on the shoe.
Conclusion
Making custom shoes can be a great pastime, and it will give a twist to your regular shoe collection. You can choose one of these methods to create custom shoes so that you can look unique wherever you go.